Students ID Cards Maker for Mac Screenshots
School ID Card Maker Software is created with advanced features to design student ID cards in educational institutions like schools, colleges, and universities. Using advanced Live Group and Batch Processing Mode, the ID card design program makes it simple to create ID cards for a group of students using an Excel data file. When creating student ID cards, the software gives users the choice of taking a photo with a camera or Browsing pictures on a computer. When needed, the application's advanced mail feature allows users to send designed student ID cards to specify email addresses. It also includes an inbuilt image cropping tool that allows users to crop one or more images for ID cards.
With the help of various designing objects, such as rectangles, barcodes, image libraries, signatures, and watermarks, you can easily create your student ID card. Software enables you to generate multiple student ID cards in various sizes and shapes. Software enables you to export student ID cards that have been designed as images, PDF, or templates.
# Process to design professional identification cards using Student ID Card Maker Software:
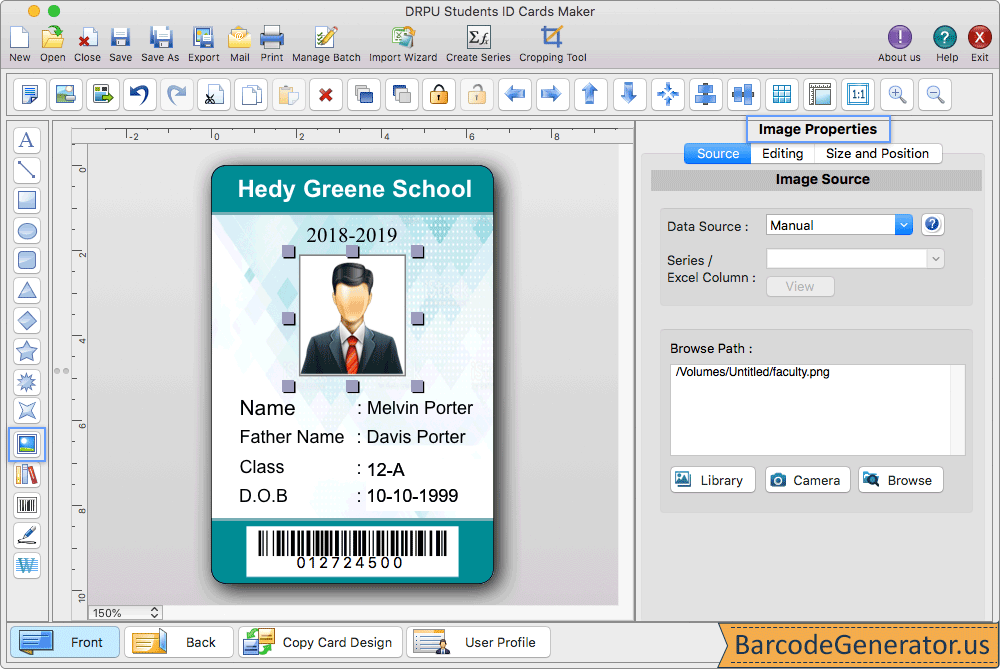
Step 1 : Double Click on Image to open the Image Properties then set the size and position of the image.

- To enter text on the card, select the data source option 'manual' or 'series' in the general properties.
- In 'Select Image Path' tab, you can browse images from your PC, from your library, or capture images with the inbuilt camera setting.
- If you want to image border, enable 'Show Image Borde' option and select border color, style, and width.
- In other properties tab, set the values for hue, contrast, brightness, and rotation angle of the image.
- After changing image properties, Preview your image, then click the OK button.
Step 2 : To add ID cards details, go to Save Detail and select that particular entry which you want to add on your ID Card.

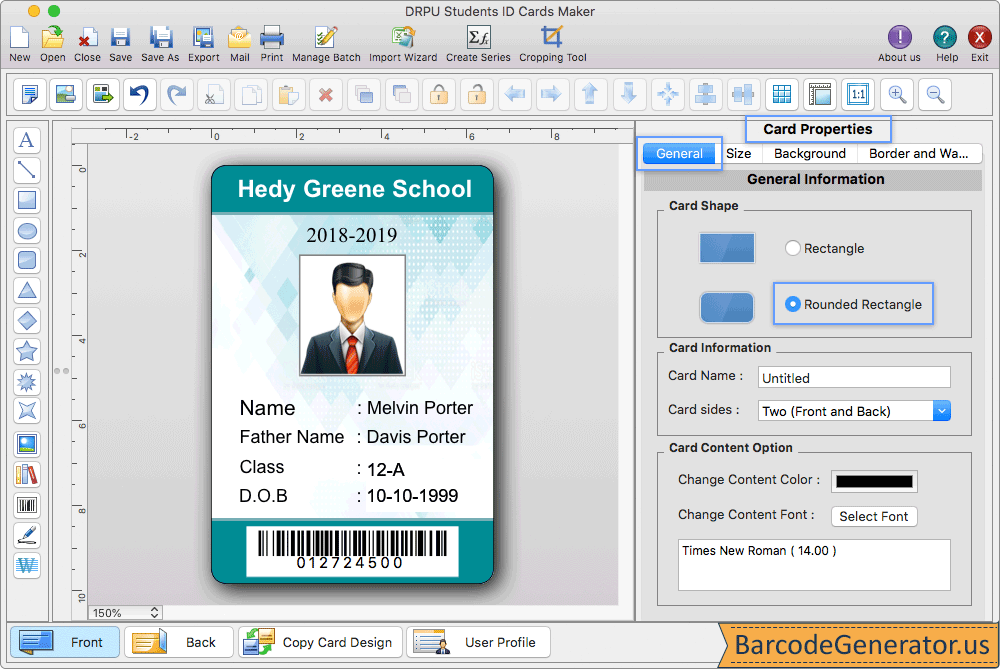
- Card category, card sides (front or back), and card shape (rectangle, rounded rectangle, or ellipse) are all options in general settings.
- Choose the standard card size and enter width and height of card using the size tab.
- Using background properties select a background color or browse background images for the card. Set the width and color of the border.
- User can also add Linear or 2D Barcode to the card from left toolbar.
- In Barcode Properties wizard, change the Color Settings and General Settings of the barcode.
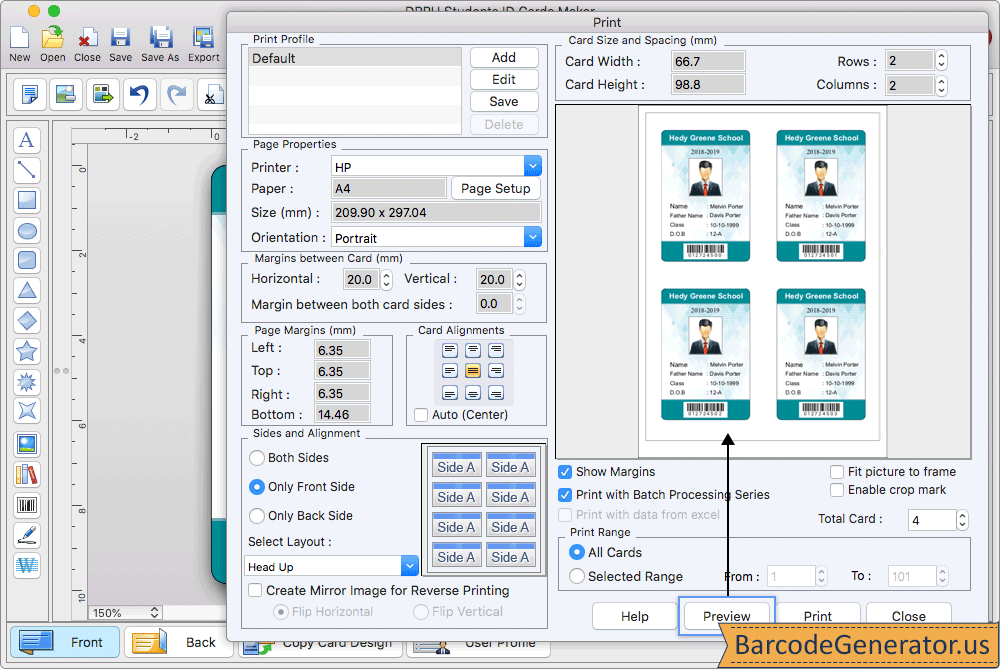
Step 3 : To print your ID Card, Go to print button in toolbar, set all printing settings.

- Add the printer type, paper type, orientation, and paper size to page properties tab.
- Select card size (width and height) and left, top, bottom, and right page margins.
- Set vertical or horizontal margin between cards as well as margin on both sides in Margin between Cards option.
- Define printing range, maximum number of cards that can be printed on a page, number of columns on page, and other options.
- After setting all the details, print your card using the ‘Print’ button.